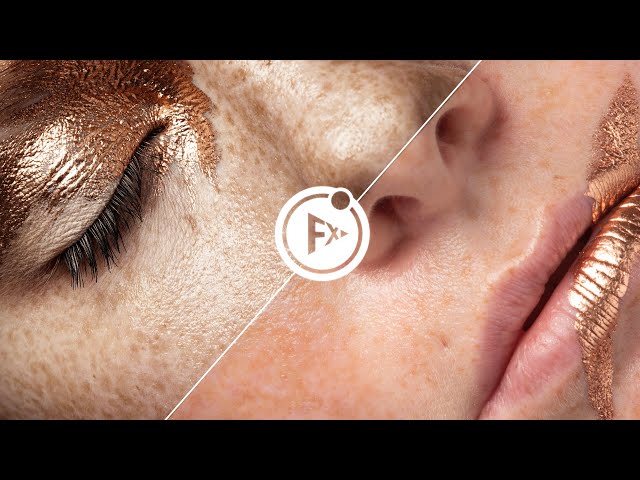
Inverted High Pass is a preset from the Retouching Bundle. This is a popular retouching technique for smoothing skin areas. You can either define the blur factor automatically or manually. In addition, you can define which tool with which settings will be selected afterward.
To protect your personal data, your connection to YouTube has been blocked.
Click on Load video to unblock YouTube.
By loading the video you accept the privacy policy of YouTube.
More information about YouTube’s privacy policy can be found here Google – Privacy & Terms.
Default High Pass Value

With the slider, you can specify which value is selected by default for the high pass.
Blur Factor

You can automatically calculate the blur with a factor of 1: 4 or 1: 3. You can also define your own value by selecting “Own”. The Blur dialog will open when you create it.
Show Dialog

If this option is disabled, the high pass will be applied with the standard high pass value you defined. We recommend you always set the value depending on the picture. Activate the option to open the high pass dialog, so you can change the values individually.
Layer Settings
You can define the name and color for the layer.
Selection

After creating the layer, you can either select the actual layer or the layer mask.
Invert Mask

If the option is active, the mask will be black, and layers will not be visible. With a white brush, you can now partially make areas visible. If you want the entire layer to be visible from the beginning, you need to disable this option.
Add Parameters

You can add the values used for the high pass (high pass value and blur radius) as abbreviations in the group name, e.g. “(HP: 12px, Blur: 3px)”.
Group Settings

The layer will be placed in a group if this option is active.
Group name & color
You can define the name and color of the group.
Tool
Choose whether to select a tool after the inverted high pass action. For each tool, you can use the current settings or define a tool preset (if any). The following tools are available:
- Brush
- Clone Stamp
- Healing Brush

