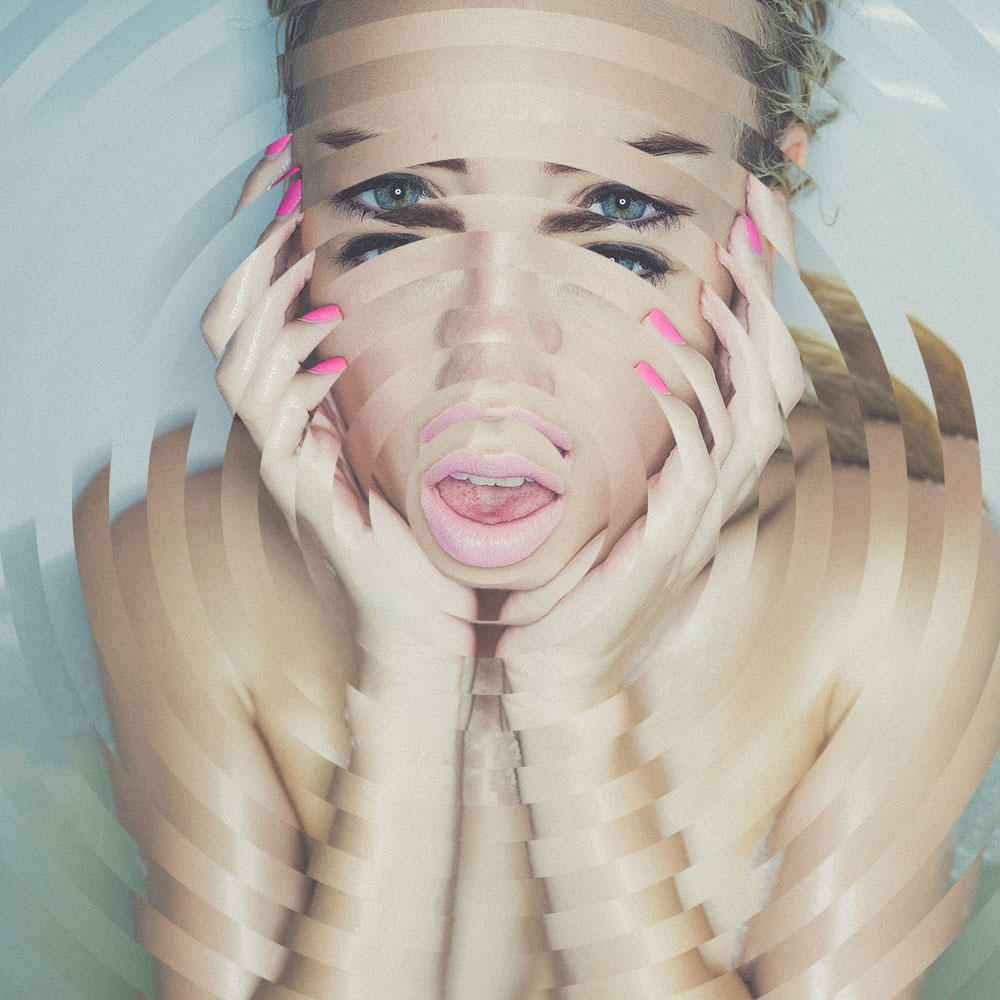
The Oribital Slicer is a preset from the Geometric Slicer bundle. It allows you to divide your document into orbital layers or smart objects. The shape is generated by a layer mask. There will be no visible effect! But the splitting is a perfect basis for further processing.
To protect your personal data, your connection to YouTube has been blocked.
Click on Load video to unblock YouTube.
By loading the video you accept the privacy policy of YouTube.
More information about YouTube’s privacy policy can be found here Google – Privacy & Terms.
Basic Adjustments
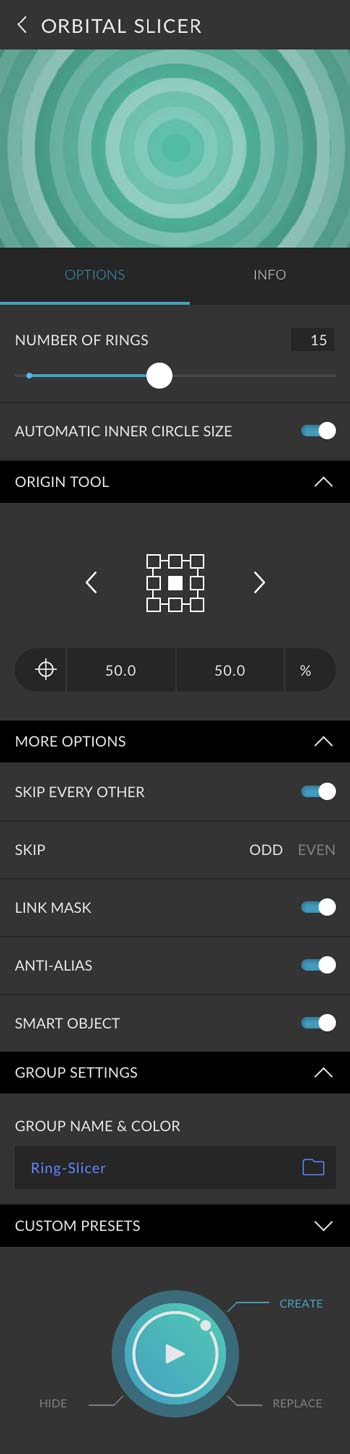
Number of rings
Define in how many individual elements the image should be divided. You can choose between 3 and 30 elements. Each ring is applied as a layer mask to a copy of the original layer. Keep in mind that only half of the elements will be created if Skip Every Other is active.
Automatic inner circle size
The inner circle size is automatically calculated based on the document size. You can set the diameter manually, if you disable this option. A slider will appear, allowing you to set a value between 1 pixel and the document length. The larger the inner circle, the narrower the rings become.
Origin Tool
The origin tool helps you setting the point of origin in a document. Therefore you can use the graphics with the corresponding anchor points, two text fields for the X and Y coordinates or the crosshairs tool, which allows you to click right into your image. By default, the point of origin is set to the center of the document.
More Options
Skip every other
This is one of the most useful features in this preset. While the number of elements defines how many rings should fit into your document, this options allows you to skip every other ring. If you set 10 elements, you will actually get only 5 ring layers. There will be also 5 “transparent gaps” where the background shines though.
Skip (even/odd)
If Skip Every Other is active, you can choose whether the odd or the even rings should be skipped. So, if you have 10 elements and odd is active, ring no. 2, 4, 6, 8 and 10 will be created.
Link Mask
This option allows you to define whether the layer mask should be linked to a layer or not. If you want to move the content within the shape, you should unlink the layer mask. But if you want to move the whole shape, the layer mask must be linked. Read more about layer masks in this article from Adobe.
Anti-Alias
With anti-aliasing you can diminish jaggies. Deactivated, the layer mask will have very hard edges. Activated, semi-transparent pixels will be added to smoothen the stair-stepping of the edges. Attention: if two anti-aliased layers are directly next to each other, you can get white or transparent gaps. In this case, we recommend to deactivate anti-aliasing. Read more about aliasing in this article from Adobe.

Smart Object
Defines if the content should be converted to a smart object or kept as a regular layer. Smart objects allow you to work non-destructively. Read more about smart objects in this article from Adobe.
Group Settings
You can define the name for the group. Click on the folder icon and set a color for the group.
Custom Presets
All settings can be saved as Custom Presets and accessed easily at any time. Read more about Custom Presets in this article.
Create Button
With this preset you can create, replace and hide. Read more about the Create Button in this article.
Example
Panel Options Screenshot