New Layer is a preset from the Retouching Bundle. It creates a layer with one click. You can define both blending mode and opacity for the layer. In addition, you can specify where the layer will be placed, e.g., in a specific folder. You can attach a layer mask to the layer, which is either black or white, or a luminance mask. Once the layer has been generated, a tool of your choice can be automatically selected.
Basics
Blending mode & opacity

Define the blending mode for the new layer. You can choose from all blending modes Photoshop offers. You can also set the opacity.
Place

Set whether to create the new layer above or below the currently selected layer. If the background layer is selected, the layer will always be created above it.
Layer Settings
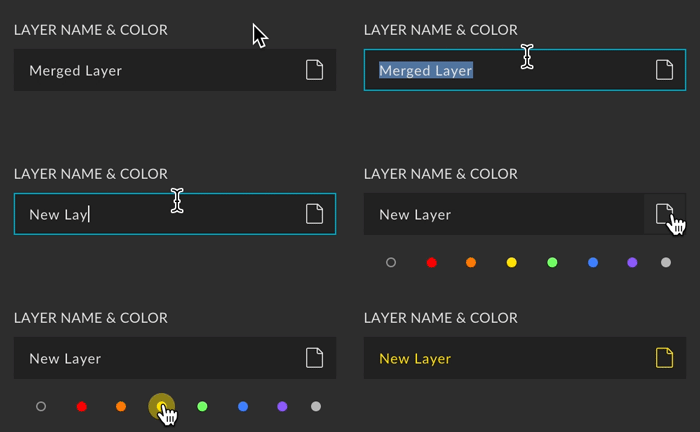
Layer name & color
You can define the name and color for the layer.

Protect
You can lock or freeze the layer as you create it. The following options are available:
- None
- Position
- Artboard Autonest

Count Layers

To make it easier to distinguish each layer from another, use this option to add a numeration to the layer name.

Reset Counter

After you press this button, the numbering will be reset. The next layer that will be created starts with the number 1 again.
Group Settings

The Dodge & Burn layers will be placed in a group of your choice if this option is active.
Group

New Group
For each new layer you create, a new group will be created.
Dedicated group
With this option, a new layer will always be added to the same group. If a group with the defined name doesn’t yet exist, it will be created automatically. Of course, you can move the group within your layer hierarchy.
No subgroup

If this option is active, and the currently selected layer within a folder, the group will not be created within this folder structure, but at the top.
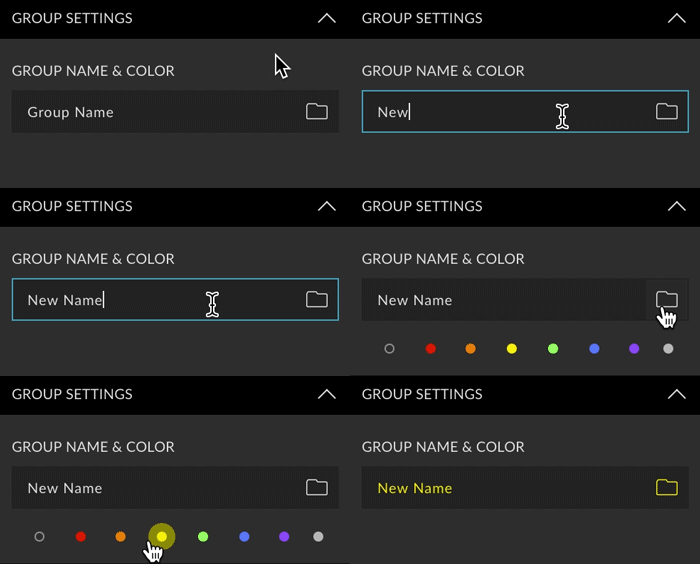
Group name & color
You can define the name and color of the group.

Layer Mask

You can add a layer mask to the layer. There are three options for you to choose from.
| White | White mask. Everything that happens on the layer is visible. |
|---|---|
| Black | Black mask. Everything that happens on the layer remains invisible for the time being. |
| Luminance | You can use your documents to create a luminosity mask for the layer. The following options are available for this. |
Reference (with luminance mask)

You can define whether the luminance mask should be based on the entire document or only the currently selected layer.
Color Range (with luminance mask)
Here you define where the luminance for the mask should come from. The following options are available:
- Highlights
- Midtones
- Shadows
- Skin Tones
- Custom… (dialog opens)
- RGB
- Red Chanel
- Green Chanel
- Blue Chanel
Open Dialog

For highlights, mids, shadows, and skin tones, you can choose to keep the color space dialog open in Photoshop, so you can fine-tune the luminance mask.
Tools
You can choose a tool after creating the layer. For each tool, you can apply the current settings or define a tool preset (if any). The following tools are available:
- Brush
- Healing Brush
- Spot Healing Brush
- Clone Stamp
- Pencil


