Once you’ve installed the FX-Panel, you can start adding your bundles, actions, scripts or camera raw filters. This guide will help you get started.
How to use the FX-Panel
You can decide, how you want to use the FX-Panel, since it can be used for multiple purposes, such as:
- using our presets and bundles from the FX-Panel shop.
- managing your Photoshop scripts & actions.
- creating your own Camera Raw filter.
- combine all of those things.
Getting started
No matter how you decide to use the FX-Panel, once you’ve installed it, you want to open it in Photoshop.
- Go to Photoshop > Windows > Extensions > FX-Panel
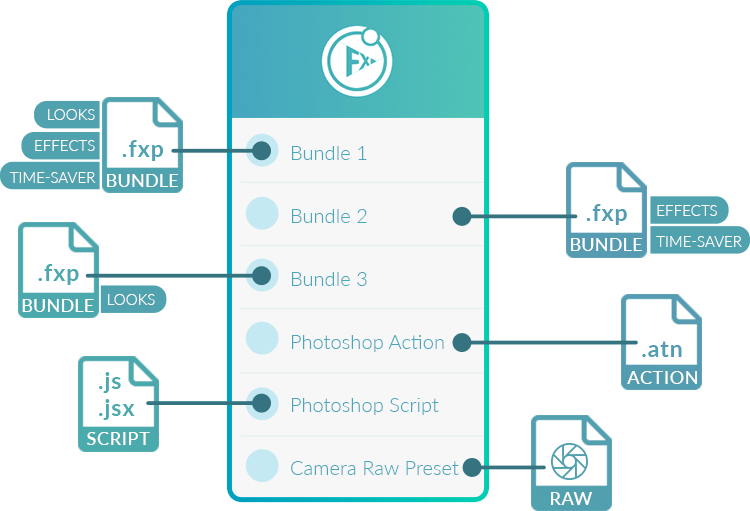
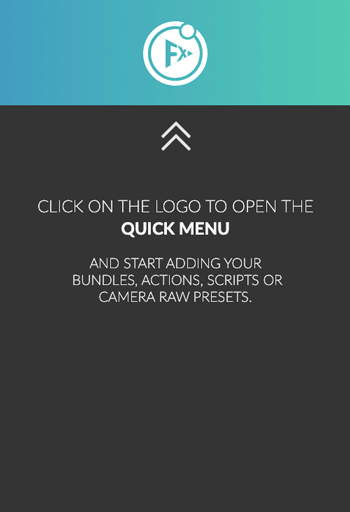
Most users already bought one of our bundles. The easiest way to get them installed, is to simply drag the .fxp files into the FX-Panel. Nevertheless, you can always enter the Quick Menu, which will help to add presets.
- Click on the FX-Panel Logo in the Banner to open the Quick Menu.
- Click on the preset type you want to add.
Here are more detailed descriptions on how you can add presets to the FX-Panel:
- add Bundles to the FX-Panel
- add Actions to the FX-Panel
- add Scripts to the FX-Panel
- add Camera Raw filters to the FX-Panel
Applying presets
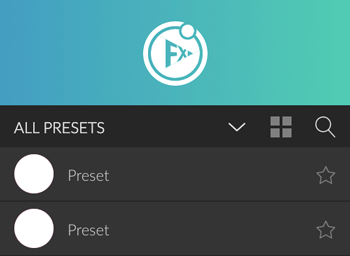
One you’ve added presets to the panel, you probably end up in the list view. Now it’s time to apply a preset to your image.
- Open an image in Photoshop.
- Select the preset you want to apply in the FX-Panel.
- Additional buttons appear, when a preset is highlighted. Click on the play icon to apply the preset.
Adjusting presets
All presets have Preset Options that allow you to adjust some parameters.
- Select the preset you want to adjust in the FX-Panel.
- Additional buttons appear, when a preset is highlighted. Click on the options button to open the Preset Options.
- Make your adjustments and click on the Create Button.

