Export Presets for Social Media and more
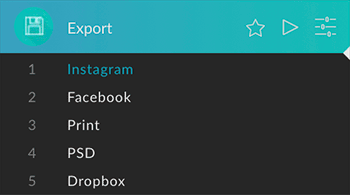
In this tutorial DomQuichotte shows you how to save your documents in different file formats with the export preset from the Essentials bundle. You can define the image size, the file name and the destination folder, so you can optimize your image for Facebook, Instagram, Pinterest, Dropbox, etc. and export it automatically in no time.
1. Open image
First of all, you need to load an image in Photoshop so you can open the export preset’s preset options from the Essentials bundle. This is necessary because the image size of the current document is relevant for the parameters in the preset options.
2. Set format
Let’s start with an export preset for Instagram. Open the preset options of the Export Preset and select the format JPG. Under the accordion format options you’ll find details about the respective file format. Set the quality to 10 and the color profile to sRGB.


3. Adjust image size
In the Image Size Accordion, turn on the Change Image Size option. Select Width as the reference and set it to 1080px. Disable No upscaling and change the resolution to 72. Sets the scaling mode to automatic.

4. Change document name
You have the option to add a suffix to the exported image, add a numbering or rename it completely. In this case we want to add the suffix “_Instagram”, so FileName.jpg becomes FileName_Instagram.jpg. Thus, the purpose of the image can be read off by the file name.

5. Define destination
In the accordion Destination, you define the location where the image should be saved. Amongst others, you can choose between the original folder, parent folder, or a specified folder. You can also create subfolders, if they don’t already exist. In this case, we want to leave the image at its original destination, but in an Instagram subfolder.

6. Sharpen
You have the possibility to apply a custom preset of the Sharpening Preset (also in the Essentials bundle) before the document export. For this, you should first create a custom preset. Switch back to the list view and open the preset options of the Sharpening preset. To not make things too complicated, select the following settings:
- Method: Unsharp Mask
- Show Dialog: off
- Smart Object: off
- Accordion Unsharp Mask: Amount: 120 | Radius: 0.8 | Threshold: 20


Deactivate the Group, Add Layer Mask, and Select Tool options. Save the settings as custom preset, e.g. “Sharpening for Instagram” and go back to the preset options of the Export preset. Under the Accordion Sharpening you can now select the user preset.

7. Create Custom Preset
If you don’t want to set these parameters every time, you can save them. Open the accordion Custom Presets and click on the + icon to the right of Add new Custom Preset. Double-click the name of the new Custom Preset and rename it to Instagram.

8. Apply preset
Click on the Create button. Your current image will now be scaled, renamed and saved in the destination folder with the format you defined. You can also apply the Custom Preset directly from the list view. To do this, the Show Custom Preset option must be activated in the FX-Panel main settings under the List View accordion. If you now select the export preset in the list view, a list with all saved Custom Presets will appear, which you can apply by double-clicking.


More Custom Presets
In the table below you will find parameters that you can use for additional Custom Presets. Of course you can adapt these to your own needs.
Free download of Custom Presets for Export and Sharpen (Members only)| PSD | Dropbox | |||
| Format | JPG Quality: 10 sRGB | PSD Save Layers: yes Default Bit Depth Default Color Profile | PNG Transparency: yes Include Profile: yes | TIFF Save Layers: no LZW Compression Default Bit Depth Default Color Profile |
| Size | Change Image Size: yes Width: 1200px No Upscaling: no Resolution: 72 Automatic | Change Image Size: no | Change Image Size: yes Lange Kante: 2000px No Upscaling: yes Resolution: 72 Automatic | Change Image Size: yes Percentage: 100% Resolution: 300 Automatic |
| Name | Suffix: “_Facebook” | Suffix: “_Print” | ||
| Destination | Original Folder Subfolder: “Facebook” | Original Folder Subfolder: “PSD” | Specific Folder Path: Dropbox | Original Folder Subfolder: “Print” |
Leave a Comment
You must be logged in to post a comment.


Hallo Dom
Das ist ein klasse Preset und erleichtert mir die Arbeit sehr. Für mein Fotojournal und für Social Media brauche ich diverse Auflösungen der Bilder. Ost ist es so, dass die Bilder im Presseverteiler wahnsinnig groß sind und 1:1 gar nicht zu verwenden sind.
Durch das Preset spare ich den Umweg über Exportieren, Für Web speichern.
Also wie gesagt, ich nutze es gerne und freue mich über die Arbeitserleichterung.
Auch die anderen Bundle für das Panel kann ich an dieser Stelle nur empfehlen.